Miniature Die-Cut Scene

Do you love basic metallic or glitter cardstock colors like gold and silver? Not sure what to do with them or how to use them both on the same card? My card uses both colors plus a few other colors and textures to create a miniature die-cut scene.

Step-By-Step Instructions
1. Cut a piece of Basis White 110lb Cardstock to 4 1/4” x 5 1/2”. Then, cut the following into 3” squares: CCS Silver Glitter Cardstock, Curious Metallic Gold Leaf Cardstock, Curious Metallic Black Night Cardstock, Basis Black Cardstock, Pop-Tone SnoCone Card Stock. Ink blend navy ink onto Pop-Tone SnoCone Card Stock to make a night sky. You will also need a piece of CCS Silver glitter Cardstock to cut the frame.

2. Use the positioner tool to trace with a pencil where the scene will go on the Basis White 110lb Cardstock.

3. I don’t have any square dies, so I used my paper trimmer to cut the square we traced in step 2. Line the pencil line up with the wire, cut from one line to the next, and make sure the cutter’s arrow doesn’t go past the pencil mark.

4. Die cut all pieces shown above.
5. Next, adhere pieces together with liquid glue.
6. Add frame only to panel and stamp the sentiment in navy ink.
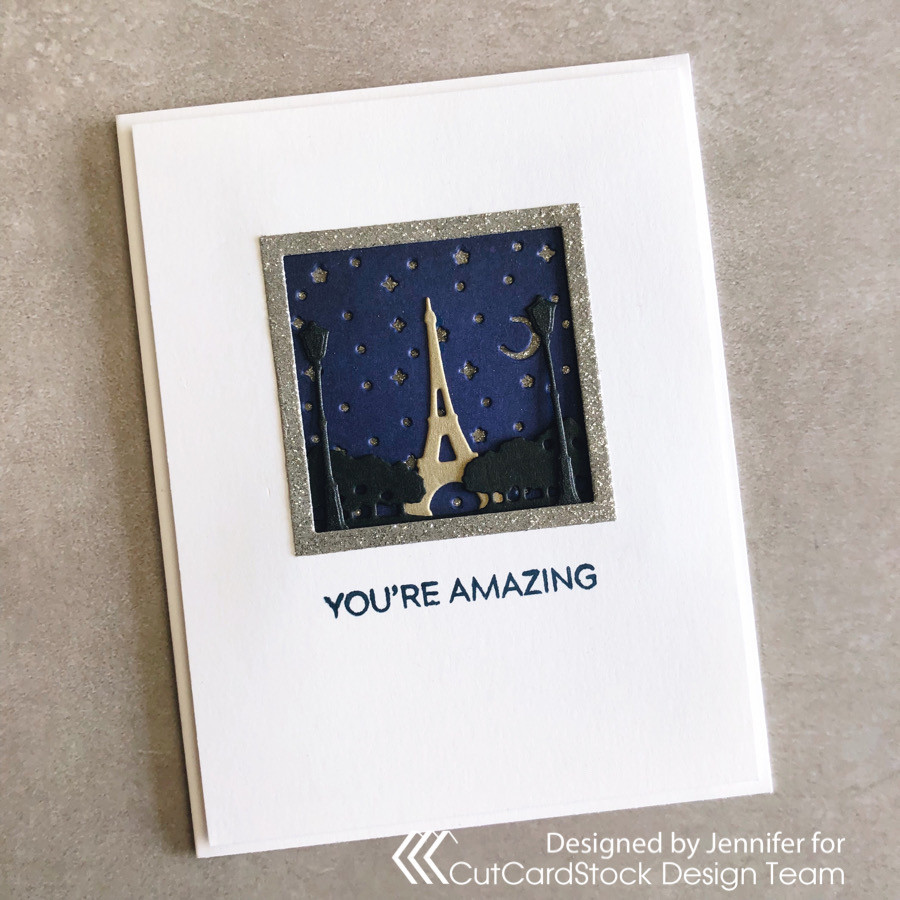
7. Adhere scene to panel.
8. Cut panel to 4” x 5 1/4” and place on an Premium Classic Crest A2 Folded Discount Cardstock with foam tape.
I love using the different textures in this miniature die-cut scene and making both the silver and gold stand out, but they don’t compete with each other. I attempted to use a solid color cardstock for the night sky, but it made the scene look dull. Adding the ink made things come alive. We’d love to see what you make with gold and silver cardstocks.
Discover more from CutCardStock Blog
Subscribe to get the latest posts sent to your email.


