FALLing for Pumpkins: Filigree Pumpkin Lantern!
I am so happy to be sharing my first Autumn project with you! I look forward to this season all year; the smells, the colors, the flavors, all of it. Let’s bring some of it inside! I used cut files, dies, sequins, gel printing, all my favorites! If you want to create along here is a link to SVGCuts, they created and sell the cut files needed to create this adorable pumpkin lantern!
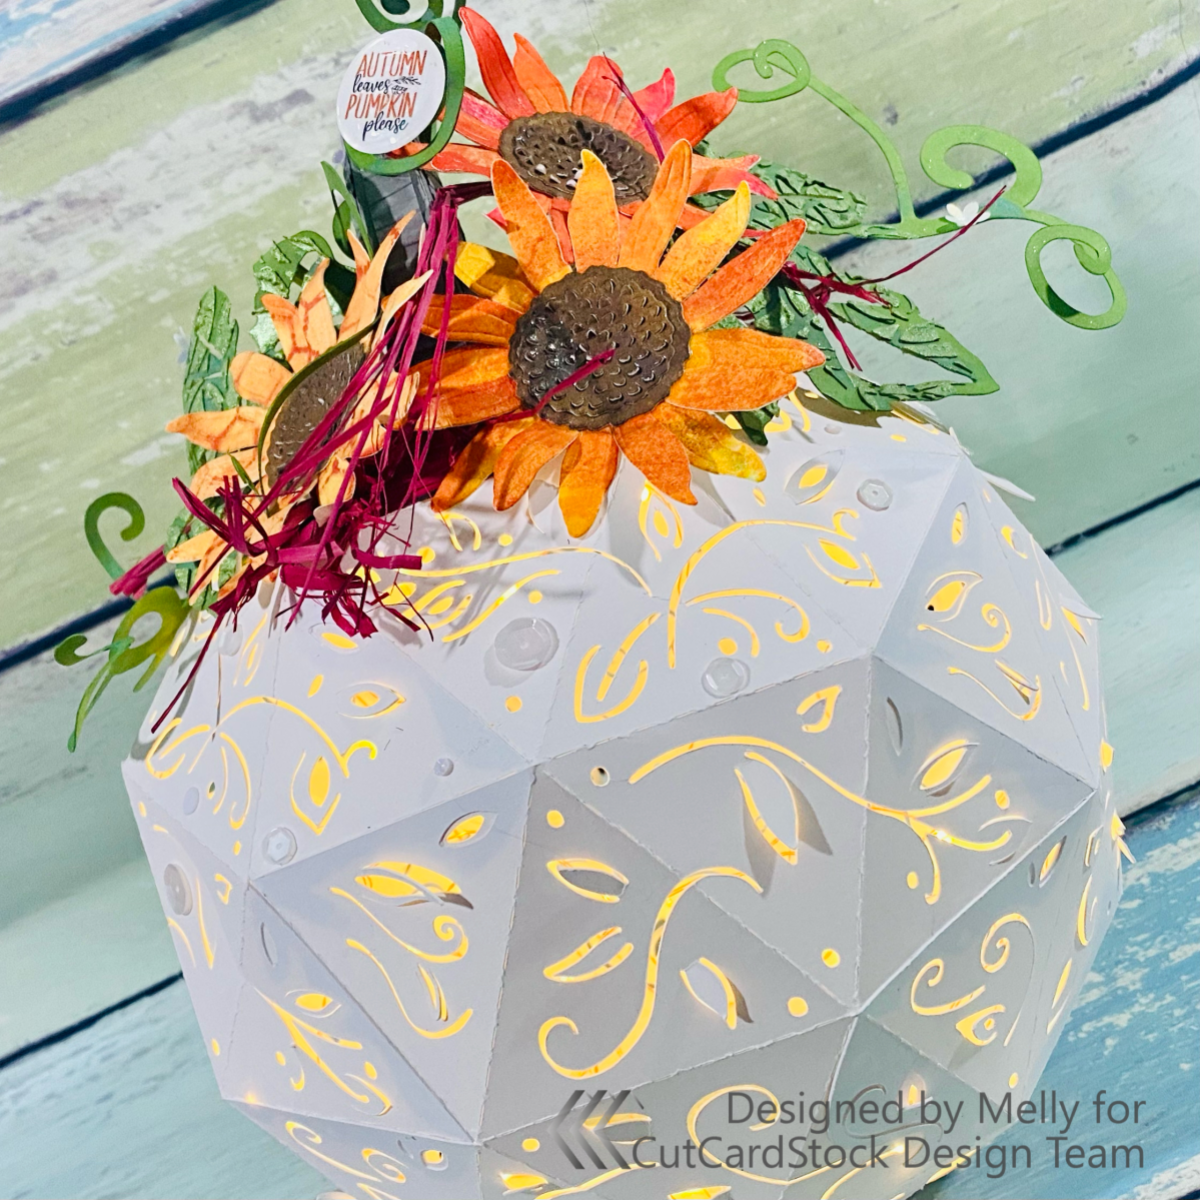
Filigree Pumpkin Lantern


I started this project off with some sheets of Cougar White Cardstock and Classic Crest Cardstock in Pewter Gray. Starting with the pumpkin itself, I cut out all the pieces in the white cardstock and the stem in the gray. I cannot stress this enough, these two papers, cut absolutely fabulous on the Silhouette! There are no nicks, no tears, it did not get stuck on anything, it just cut. Everything popped right out, and looks stunning!


When gluing the pumpkin lamp pieces together, I used Nuvo Deluxe Adhesive. I have used Scotch Quick-drying Tacky Glue as well, and that works great as well. You want to make sure you’re using a quick-drying glue and a good one. Otherwise, you’ll be waiting forever for each piece to dry, and/or it will fall apart after a few weeks. The Nuvo and the Scotch glues, hold these papers together forever! I have yet to have anything made with this cardstock and glue, fall apart.


I embossed wood grain on the stem panels, to give it some texture, and some curb appeal. The stem adheres on the inside, so be careful when putting this in that you don’t rip it. I would suggest putting the stem on before closing the bottom. The creators of this particular cut file have a video walking you through putting this together on their site, I don’t know if they mention that or not. I have put together so many of their 3-D projects I didn’t watch the video for this.


The Sunflowers for this were so much fun. I used a gel plate and some Catherine Pooler inks and played with fall colors for the petals and centers. I also used a hexagon stencil to add a little more design to one of them. Ran it all through my Big Shot, and put them together, bending the petals as I went, adding dimension to them. The leaves I cut out of Basis Gum Drop Green, adding some Oxide Ink it.


At the last minute, I decided to add some Nuvo Expanding mouse, Brambly Apple, to the leaves. I love adding layers to things like this. It adds texture, as well as it just looks so pretty! I sprayed my sunflowers with some shimmer spray, It’s my favorite! I adhered the leaves and sunflowers to the pumpkin lantern with hot glue. It “drys” fast, and holds up great. Looking at this, I knew it needed something else, so I went stash diving and found some red raffia! I also added some white sequins from SpiegelMom Scraps, Wearing White mix.


I hope this inspires you to step off the page and try something new and so it’s so much fun creating things like this pumpkin lantern. You can make it however you want, any color, any embellishment, and its uniquely yours! If you carefully store this, you can bring it out every year! If you are like me, and you need your autumn pumpkins all year, go for it!
Happy Crafting!
Melly Art
Your Lights! I used a string of Fairy Lights i found at amazon! Unravel them, slowly thread them into the bottom, making sure that the switch is just inside. You can also use a low watt light bulb, for a salt lamp. Just remember it is paper! You don’t want a fixture that heats!

Discover more from CutCardStock Blog
Subscribe to get the latest posts sent to your email.


