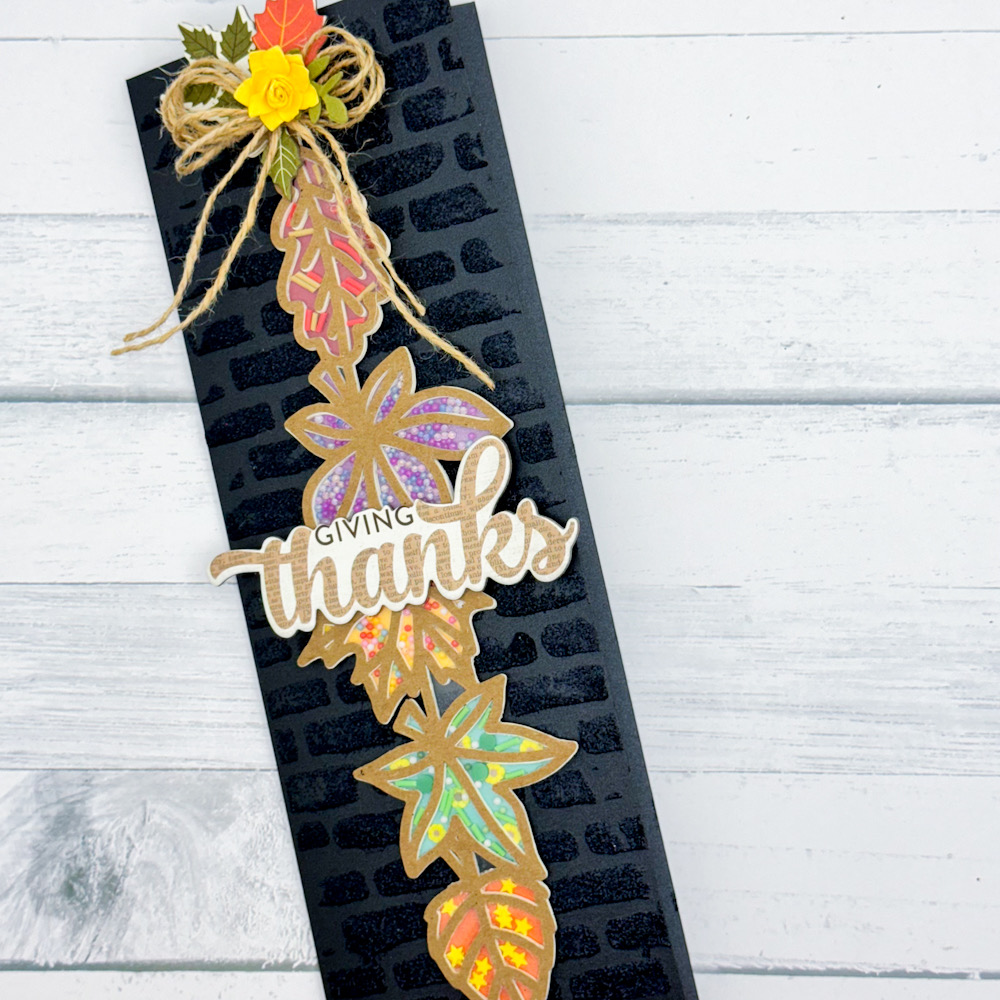
Thanksgiving Shaker Card
Howdy, Y’all! And Happy Fall! Misty (@Mommyofkidz) here today sharing another fall inspired project with you.
I have recently decided to force myself to make more cards and try to hone my skills. I’m not saying that I will ever be a fantastic card maker, because that will NEVER happen. However, I think I have gotten a little better, if I do say so myself.
Those slimline cards that I am seeing everywhere have caught my eye, therefore, I had put it on my “list” of cards to try to make. World Card Making Day a few weeks ago inspired me to go ahead and stop procrastinating.
Materials:
To begin, I always like to gather my materials. I do not like having to stop and search for something in the middle of a project. For this card, I used:
Stardream Metallic Black 12×12
DCS Shimmer Textured Dove 12×12
Brown Bag 65lb Kraft
An assortment of scraps from the Stardream Metallic Cardstock collection
Acetate
Various fillers for the shaker
Jute string
First, I used the DCS Shimmer Textured Dove 12×12 and cut my SVG leaf file with my cricut. For the depth of the shaker, I cut it four times using this cardstock. The bottom layer is the only one that needs to be backed with cardstock. My handy dandy scraps collection was perfect for this. I dug in and found an assortment of Stardream Metallic Cardstock to back all of the leaves in the SVG cutfile from Peartree Cutfiles. Next, I used the Brown Bag 65lb Kraft to cut it a fifth time, this layer will serve as the top in which the acetate is adhered to.


Preparing the Body
Once upon a time, I had tried my hand at card-making. Back then, I had a scoreboard, bone file and everything! Well, after cleaning a bit in my scrapbook-nook a few weeks ago, I found them again! I used the scoreboard and added folds to my Stardream Metallic Black 12×12. For the slimline card, I wanted a threefold look.


After adding the scores to my cardstock, it was time for the details. I reached for my Nuvo black glitter texture paste and my brick wall stencil from Peartree and got to work. Once I hade sufficiently covered the background, I used my heat tool to dry it quicker. I am definitely an impatient person when it comes to crafting. The heat tool is my savior sometimes!


Finishing it Up
Once the brick wall background had dried completely, I was able to add the shaker to it. Oh My Goodness! I loved how clean this turned out…yet so eye-catching! I honestly did not expect to love it as much as I do!
After the shaker element was in place and secure, I was able to add in a few tiny details to make it POP. A bow made from Jute string and some chipboard stickers from a very old Carta Bella collection (circa 2014) was just perfect!

Thank you for stopping by and visiting today! I know that I normally share scrapbook layouts with you all, and I promise I will go back to that next time! However, I have had a bit of fun trying my hand at card making. Again, I am not a professional card maker…I’m not even saying that I am GOOD. What I will say…is that I have come out of my “box” and I am giving it a shot! I hope that I have inspired you in someway today…maybe there is something that you have been wanting to try? Head on over to the Cut Card Stock Store and gather your materials. I would love to see what you create!

Discover more from CutCardStock Blog
Subscribe to get the latest posts sent to your email.


