Baby Mini Album
Hey there! It’s Judy V here with pretty simple baby mini album project created with card stock from CutCardStock.
Do you have photos from a special occasion, holiday or everyday memories? A mini album would be a great place to showcase them and they make great gifts. Having just become a grandma a month ago, I will be filling this one with photos of my grandson.

Album Construction
I chose solid card stock in colors I felt would work well for a baby boy.
Pop Tone SNO CONE 8.5×11 Discount Card Stock, Pop Tone BERRYLICIOUS 8.5×11 Discount Card Stock, Pop Tone BANANA SPLIT 8.5×11 Discount Card Stock,
DCS Discount 8.5×11 Card Stock: Smooth Sand Castle Tan, DCS Discount Card Stock: Aqua Card Stock, DCS Discount Card Stock: Vanilla Bean Brown Card Stock
I also pulled out KRAFT CHIPBOARD .022 for the album front and back covers.
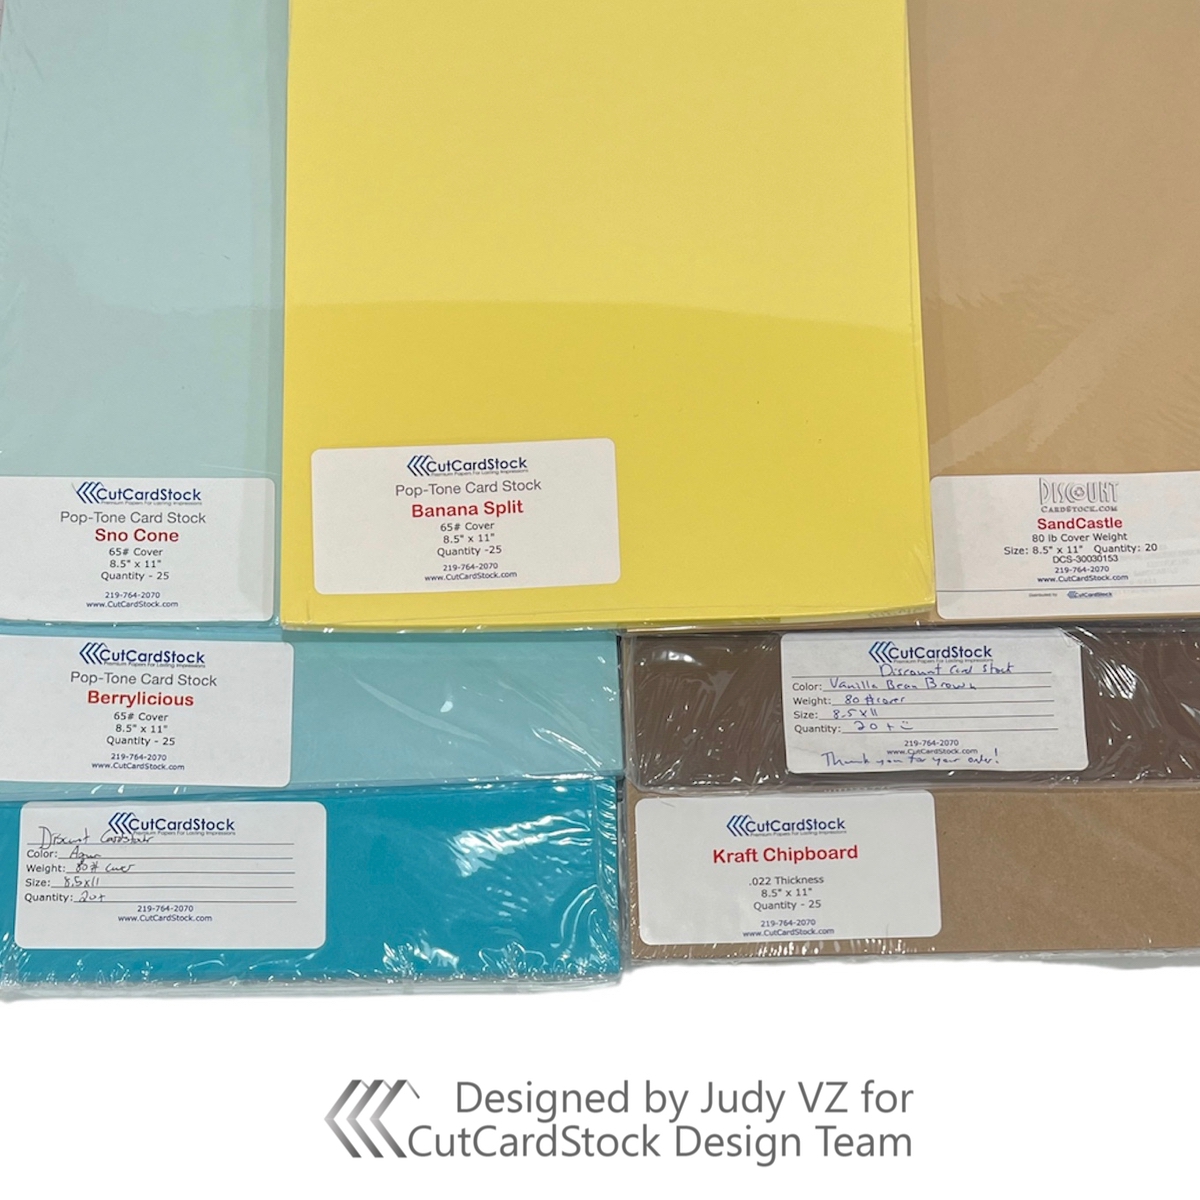
All of these card stocks are 8 1/’2 x 11 inches.
To form the pages of the album I scored and folded one sheet of each color in half along the 11 inch side. This gives me 6 8 1/2 x 5 1/2 inch cards.
The Kraft Chipboard was cut in half along the 11 inch side for the covers.

Take the first card and adhere the back to the front of the second card. I decided to add pockets, so I only adhered 3 sides together, leaving the right side open. Those two cards were then adhered to the third card, leaving the top open for a pocket. I continued this alternating the side and top pockets. You can elect to adhere all four sides together if you do not want pockets. Double sided tape was used on my album, but you can use a tape runner or wet glue if desired.


With the pages assembled it is time to add the front and back Kraft Chipboard covers by adhering to the first and last cards.


Album Cover
I chose to use a plaid patterned paper for the front and back covers. They are cut to 5 1/2 x 8 1/2 inches. A solid color card stock was cut to 3 x 8 1/2 inches and scored at 1 inch along the short side. Ribbon is cut to 28 inches.
The ribbon is adhered to the center of the album. This will be used to hold the album closed.
The patterned papers are adhered to front and back. The solid piece of card stock is adhered to the left side of the front cover with the score line along the edge, then wrapped to the back and adhered in place. This covers the binding and looks more finished.


Album Pages
At this point you could leave the pages as they are, solid card stock. I elected to add coordinating patterned papers to each page. I cut 12 pieces to 5 1/4 x 8 1/4 inches.
Solid pieces of card stock were cut to slip into the 4 pockets I created. The 2 side pocket pieces were cut to 5 1/2 x 7 1/2. The right side was punched with a border punch and now measures about 5 1/4 inches. I cut 2 pieces for the top pockets to 8 1/2 x 4 1/2 inches. The top was punched with the border punch and measures about 8 1/4 inches.


Finishing
We’re ready to add all the finishing touches. I die cut a bunch of baby themed pieces from the solid card stocks used. A little color to some of the die cuts with gel pens and ink.

Various sizes of solid card stock and a few pieces of patterned paper were cut and added along with the die cuts to decorate each page. Some stamping was added to a few pages.


I hope you have enjoyed my baby mini album and have inspired you to create one!
As always, we would love for you to connect with us over on the CutCardStock Facebook Page and out new Facebook Group Creating with Card Stock.
Discover more from CutCardStock Blog
Subscribe to get the latest posts sent to your email.


