An Owl and Some Worms | Raechelle Bellus
Hello! Today I’m sharing two fun and easy projects for back to school!
I created this set for my eldest granddaughter’s first day of school. She starts in late August, and I’ll be mailing it to her as a fun surprise to help her kick off her 2nd grade year.

How cute are those worms?! And the owl! I’m certain these will bring a fun smile, maybe even a giggle to my sweet granddaughter!
Prior to moving on to the details on how these projects came together, I’m going to share the list of all the wonderful card stocks I used from the CutCardStock online store. Both cut files are from the Silhouette Store.
Ms. Owl Teacher Glasses Basket ID #211793Discount Card Stock Black, Pop Tone Sweet Tooth, Pop Tone Wild Cherry, Pop Tone Orange Fizz, Pop Tone Lemon Drop, Pop Tone Grape Jelly, Discount Card Stock Vanilla Bean, Discount Card Stock Ginger Snap, Discount Card Stock Shadow Grey, Classic Crest Baronial Ivory, Bazzill Marble Easter Grass Card Stock
Inchworm Pencil Topper ID #55425 Discount Card Stock Black, Pop Tone Sweet Tooth, Pop Tone Wild Cherry, Pop Tone Blue Raspberry, Pop Tone Sour Apple, Pop Tone Razzleberry, Discount Card Stock Vanilla Bean
Let’s start with the adorable Inchworm Pencil Toppers:
I positioned the cutfile to fit two on the mat using an 8.5×11 piece of card stock.

After I was complete cutting, I laid them all out to begin the assembly process:

I began assembly with the eyes. I used black cardstock for three sets, and vanilla bean brown for one, just to mix it up a bit.

Next, I added the bows on one set of worms. Note: I cut each bow shape twice to add dimension. To add some more dimension, I used different colors of paint drops to add a center to each bow.

For the other set of colors, I added the mustaches. One of these is also vanilla bean brown.

Next, I folded each worm:

Finally, I threaded the pencils through each one. To do this, start with the end of the pencil (the eraser is the nose), and gently push it through the nose hole, then through the bottom hole, and then the first hole on top. Continue this process until the pencil has been pushed through all the holes. Note: I did not follow the directions that can be found for this cut file. I just did what I thought was correct and they seem to look just as pictured in the photo for the cut file. 😉
Once complete, you can gently pull/push the worm to fill out the pencil.


These little guys are so fun!
Now onto Ms. Owl:
Once everything is cut, lay out all pieces:

I began with the body front, nose and eyes (I just realized that this photo shows the steps I completed backwards- oops!).
Place and adhere vanilla bean brown pieces to the base of the owl. Adhere white eyes over black. Add some thin foam pieces to back of eyes for dimension. Adhere the yellow beak atop of orange piece. Use a foam dot on the back of beak for added dimension.
Glue eye piece to base. Add feet.

Here’s a detail of eye piece dimension:

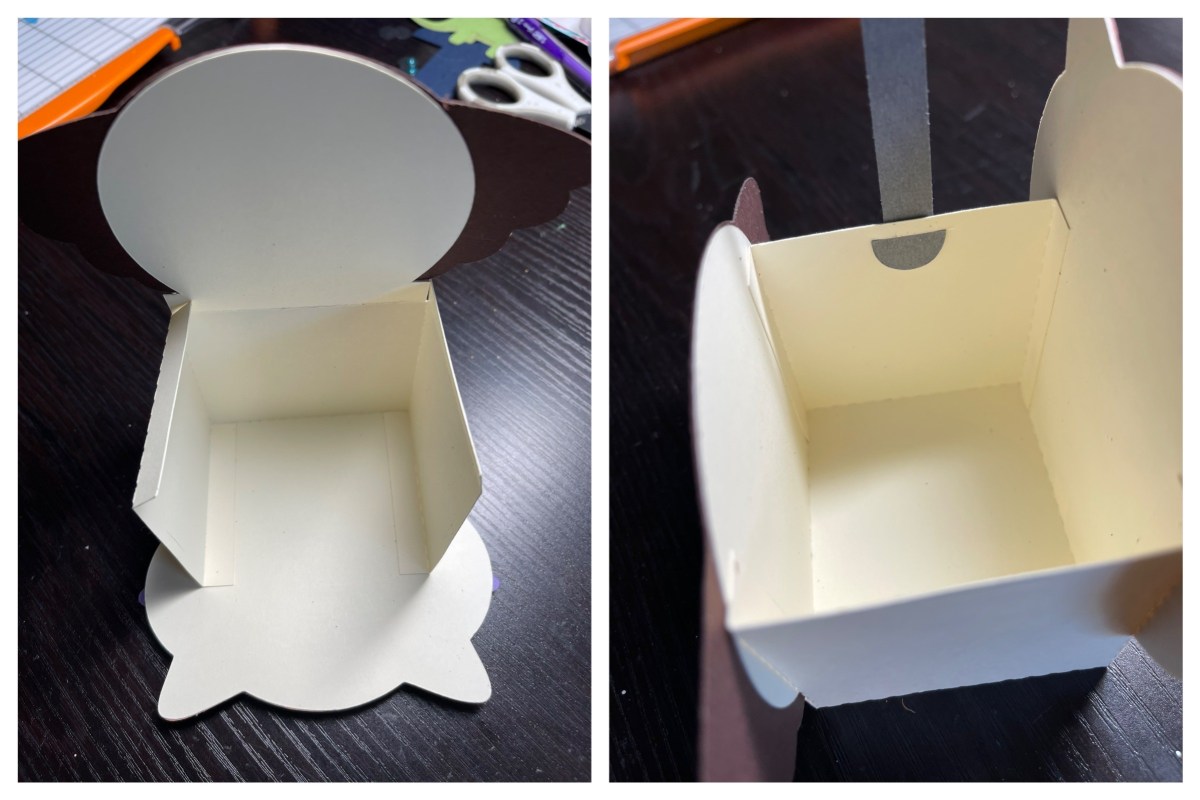
Next, add pieces to box base. Fold along edges. To the back, add back of owl body and attach tail piece. Add owl body to front.

Add the apple piece and glasses to the owl:

Now assemble and adhere side edges of box to the back/front. Add handle.
Once dry, fill with goodies and she’s ready to pass on!

Whew! That was a long one! I hope you are inspired to create a fun little gift set for your back-to-schooler!
Don’t forget to check out all the fabulous products from the CutCardStock online store! There’s something for everyone. 🙂
Discover more from CutCardStock Blog
Subscribe to get the latest posts sent to your email.


Spectacular!