How To Make a Quilt Style Layout Using Cardstock
I’ve seen lots of these layouts lately and I thought I’d give it a try. It was much easier than I thought it was going to be. This one is called a “Sunburst” pattern.

You will need 1 – 12 x 12 sheet of black, 1- 11 1/2 x 11 1/2 sheet of white, and another 11 x 11 sheet of your choice of paper since it will get completely covered up by your quilting design (This is a great way to use up that ugly pattern paper you have been trying to find a use for), plus other things like your layout colors or pattern paper, embellishments, glue, and photos.

You will start by gluing the 11 1/2 x 11 /12 sheet of white to the black base.
Next, you will need to find the center of the 11 x 11 sheet of paper. I simply do this by folding the corners together slightly and adding an X to the center of the paper. This X is where you will start gluing your quilt pattern in place.

DO NOT GLUE THIS SHEET DOWN YET. It gets glued down much later in this process.
Next, you will need to pick out 5 pieces different colors of 8 1/2 x 11 inch cardstock that you want to use for your quilt pattern. Those sheets will need to be cut down to 7 1/2 x 2 1/2 inch pieces.

I love CutCardStock’s great choice of colors and quality. It’s also a plus that they normally have same day shipping! So if I need a craft, wedding, or party project finished quickly it’s not a problem.
I used the following colors: Classic Crest Solar White Cardstock, Pop Tone Wild Cherry Cardstock, Pop Tone Orange Fizz, Pop Tone Razzleberry, Basis Green from CutCardstock Online Store.
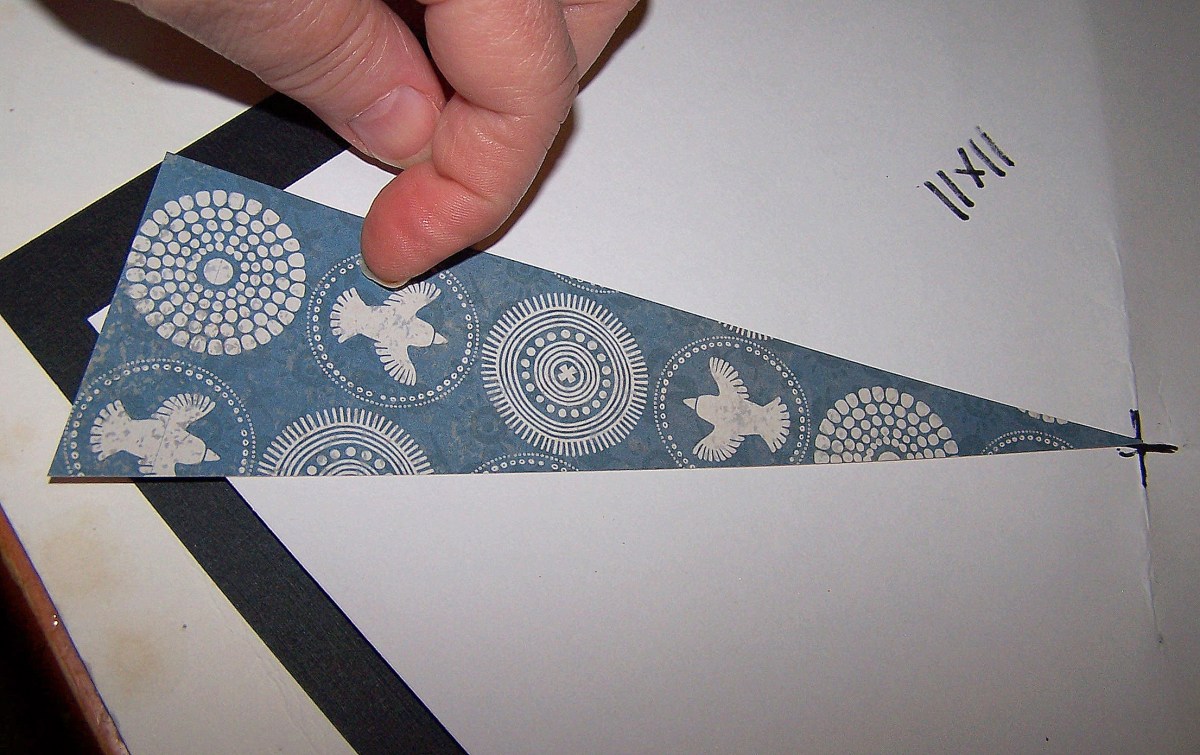
Next, you will want to cut those pieces on a diagonal as pictured below.

I have used white here as an example so that you can clearly see what the shapes should look like. You will need 4 pieces in each of the 5 different colors.

Your next step will be to start gluing those pieces onto the 11 x 11 sheet of paper that you have pre-marked the center of. The very first piece will need to be glued to the corner as shown below. (This piece is a different color than my layout just to show the layout area)
For each corner piece, you will need to pull your piece slightly down from the center X mark so that your quilt piece covers that full corner of white space.

Next, you will start gluing your pieces down in order of your pattern. These are just laid out and are not glued in place yet. You will glue all of them in place starting at the center point one at a time, remembering to pull down each of the 4 corner pieces slightly.


After all the quilt pieces are glued down flip over that sheet and trim the edges even with the white sheet. (This is NOT the white sheet on your base page.)

Next, start adding your washi tape. When adding washi tape, I don’t apply it all the way to the center of the layout unless that part will be visible. I just add it far enough to be behind my photos. Otherwise, it makes a bulky spot where all the paper and tape overlap. Adding washi tape is optional but it covers up a lot of mistakes in gluing or cutting.

Now you can add your quilt page to your base sheet. Followed by your photos and embellishments.

To make my photo mat I used – Classic Crest Solar White Cardstock, and Pop Tone Black Licorice Cardstock.

I added some embellishment’s and my title next.

This is the embellishment cluster on the bottom left of the layout. Just some simple flowers an a few brads.

Next a flower and word was added to my title cluster.

To the top of my photo I added the year that the photo was taken.


I hope you will have fun trying out your own quilt style layout in the future.
Till next time “Happy Scrapping”,
Love Penny
Discover more from CutCardStock Blog
Subscribe to get the latest posts sent to your email.


One Comment