CLASS OF 2023!
Hi, y’all! Misty here with you today, and thank you for stopping by! Today I am sharing one of my favorite crafts that I have done for my daughter’s Graduation party coming up soon. First of all, I absolutely can not believe that my youngest baby is set to graduate high school in just over a month! WOW WOW WOW!! Seriously!? and Secondly, HOW THE HECK AM I THAT old!!?? LOL It just doesn’t seem like that tiny baby of mine should be driving her own car and making her own decisions, but she is. Speaking of driving her own car, that is what I am sharing with you all today. I made a personalized faux license plate using her school colors for her to show off her “status”!
When I decided to do this, I knew that I would use it as a decoration at her graduation party. That was a no brainer to be honest. However, I was faced with the dilemma that she still was not a fan of her school colors. BLACK~ROYAL BLUE~& WHITE. I mean, how much more masculine can you get? Even better question, HOW do you make those colors seem feminine? GLITTER! That’s how! When in doubt, just add glitter!
GLITTER Makes All Things Prettier!
Don’t you agree? Well, maybe you don’t and that is ok! Glitter is not for everyone, as it does tend to make a horrendous mess! However, THIS glitter does not! THIS glitter comes from the Cut Card Stock Store in the form of Glitter Cardstock where the glitter is IN the paper–not ON it! WOO HOO! No messy glitter particles to clean up from every corner of your craft room! I truly fell in LOVE when I got my first order in with this glittery gorgeousness! I started my project by pulling out my DCS Royal Blue Glitter 12×12 Cardstock and setting it to cut with my Cricut Maker.

Using the DCS Royal Blue Glitter Cardstock, I cut the first portion of the license plate out on my Maker. Little PRO TIP for this: I always set my machine on the Glitter Cardstock setting with MORE pressure. I have found that setting to be the most successful in making 100% of the cuts successfully, with no remaining parts left to use my X-acto knife on. When I was done using the blue, I switched gears to the DCS White Glitter Heavyweight 12×12 Cardstock. Here is a secret for you…This is my ABSOLUTE FAVORITE cardstock of ALL TIME. I have used more of this white glitter cardstock than I ever thought I would. It makes it to about 70% of my layouts and projects. NOT even joking. I love it.

Putting It Together
I used to try to avoid making projects like this…you know, the kind that you have to layer. Or, the kind of project that spacing and precise placement and alignment is crucial. It was too tedious, required way too much attention to detail, and even MORE time and effort than I wanted to be putting into something that is for my personal use. Then one day, it hit me. Kind of like the frying pan from a Golden Coral Commercial. BAM! Use the negative part of the cut as a guide for placement of those critical elements! Well DUH! Now I do that or everything that I want to be straight or perfectly spaced apart. Those negative parts come in handy for so many things!

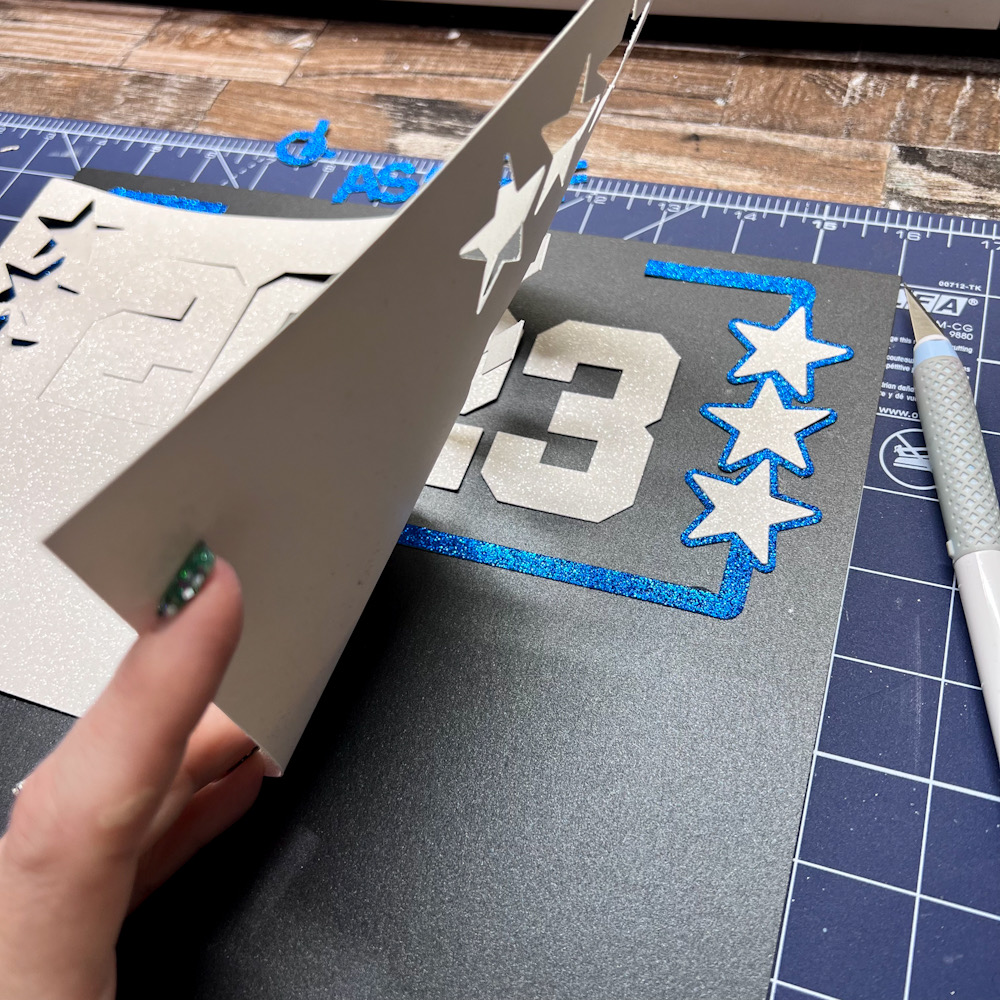
Once I got everything aligned perfectly onto my Stardream Metallic Onyx Black 12×12 Cardstock, I glued it all in place. I use on dot of wet glue to secure the elements into their desired position while using the template as a guide. Before I lifted the templates, I did check to make sure that each piece was secure enough to “stay put” in the process of my lifting. Once the templates are removed, I then go back and finish adding wet glue to the pieces to make them more secure.
Finishing Up
Finishing up a project is always my favorite part. While some people love the creative process, I love the Final Product. Being a professional Cake Decorator, I always loved the reactions when I presented the final cake at a wedding or a Birthday Party. People would say, “You made THAT with just eggs and flour and sugar??!!” Well, Yes, yes I did. There were a few other ingredients involved, but yes, that is what I can make with those ingredients. The same concept is true with cardstock.
I love the FINAL MASTERPIECE. The part where you look at it and think, “WOW, I did THAT with just cardstock and glue and a few other elements.” Or in this case, the part where my daughter said, ” WOW. I really didn’t think I would like ANYTHING in my school colors. They are so dark and manly. But I love this, Mom. I love all the things that you have made. Thank you.”
What is my secret you ask??? GLITTER!! Yes! GLITTER makes all things prettier!! LOL

While you may not be a fan of that messy stuff that comes in bottles or plastic containers all loose and willy nilly, I promise you will love this. The Glitter Cardstocks from Cut Card Stock come in a variety of colors, and are guaranteed to make anything more feminine!
I hope I have inspired you in some way today. There are so many creative projects out there just BEGGING for you to make. Why not use Glitter Cardstock to elevate the beauty of that final masterpiece!
It is on sale….Go grab yours before it is all gone!

Discover more from CutCardStock Blog
Subscribe to get the latest posts sent to your email.


