Social Distancing Expert!

I for one, love to be by myself. Crowds of people overwhelm me, Claustrophobic, anxiety, the whole thing. Being alone in one of my favorite places puts me at ease, helps me to refocus, as well just makes me feel so much better. These pictures capture that, my favorite park, me, fresh air, Peace. Here is how it all came together.

I started off with Cougar White Card Stock and pulled out some bright colors. Pop-Tone Black Licorice, Pop-Tone Orange Fizz, Pop-Tone Wild Cherry, Pop-Tone Razzleberry. Pulled out some stamps by Vicki Boutin, my favorite black ink from Altenew. I had an idea and hoped for the best.

I stamped a bunch of different things. Different flowers in different sizes, some foliage, a couple of bees and I thought maybe the words could be the title. I ended up not using those, though. An idea came later for the title.
I wasn’t sure how I wanted to color these… watercolors, art crayons, colored pencils, alcohol markers, even paints.


I went with the Spectrum Noir Alcohol Markers. I love that they have all three colors in one marker; that makes it so easy to color and the shading turns out beautiful!
Make sure you are using a Permanent Archival Ink Black to stamp and good heavier card stock as well. Make sure to let it completely dry before coloring, or the black will run into your color. I used a sheet of the Cougar White Card stock and it worked wonderfully! Once everything is dry, I sat and fussy cut the foliage and used the matching die cuts for the flowers and bees.

I took my three Pop-Tone colors, Orange Fizz, Wild Cherry, and Razzleberry, cut them into 1.5-inch strips with all the lengths different – ranging from 6 inches to 8 inches. I snipped the ends and turned them into banner strips. Using Cougar White again, along with the Black Licorice, I backed my 3 photos, which are 2.5 x 3.5 inches.

I laid it all out to get a feel for how I wanted this to look. I was happy with the overall appearance of it, but as I looked at it, I felt it needed something more. I knew I would pop pieces up and add other embellishments, but those banners I felt just needed something extra. Usually, I plan ahead for what I did, it’s rather time-consuming, but I went with it anyway…


Stitching! I kept with the same three colors, putting them on different colors so they would pop. Just a simple back-stitch for this. I would have been up all night otherwise!
I loved the pop it gave to those strips. You can never go wrong with stitching! It never disappoints. These rows aren’t perfectly straight; I can never get them perfect, but that doesn’t bother me. The more I try to make them perfect, the more messed up they get, so I just work with what I get.

Stitching is done! I added my photos and arranged my embellishments. I popped up the 2 bees, and 2 of the flowers, one on each cluster.
I don’t always like big titles, and sometimes I don’t use one at all. This needed something, but I decided I didn’t like the Be Happy, or the Enjoy Today idea. This when I remembered my new Tim Holtz Stamps!
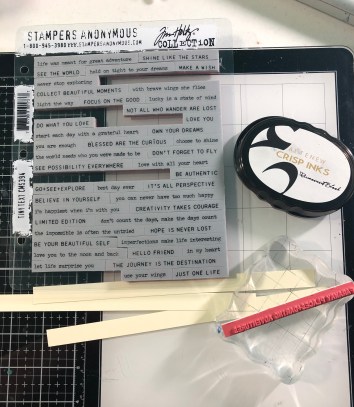

I pulled off 5 different sayings from my Tim Holtz stamps and stamped them onto strips of Classic Crest Ivory Card Stock.
Using the same paper, I used an alpha stamp from Ink Road Stamps to create my Bee Happy Title. I roughed up the edges and used a warm red ink pad to edge it with. I added another Bee on the title as well, ’cause well, he’s cute and it seemed to fit.

After attaching my title and my phrases, I used the Tim Holtz mini Stapler to add some rustic charm to the page. Being outside, it needed a little industrial feel to it, and I love how it turned out, so I also used a few staples to add some detail to the phrases as well.

I added my favorite embellishments: sequins from SpiegelMom Scraps, putting the coordinating colors on the same banners. Then, I added some Nuvo Drops, I used Autumn Red, Ripened Pumpkin, and Nuvo Stone Drops in Berry Burst. And of course, I never forget my favorite flair from ScrappinHappy Studio!
I hope you enjoyed my layout and got inspired to create! As always, please feel free to comment or ask questions! I love your feedback. Stop back soon!
Melly Art


Discover more from CutCardStock Blog
Subscribe to get the latest posts sent to your email.


